Inside Goliath: an overview of the properties page
A breakdown of how to research and prospect for off market opportunities

Austin Beveridge
Tennessee
, Goliath Teammate
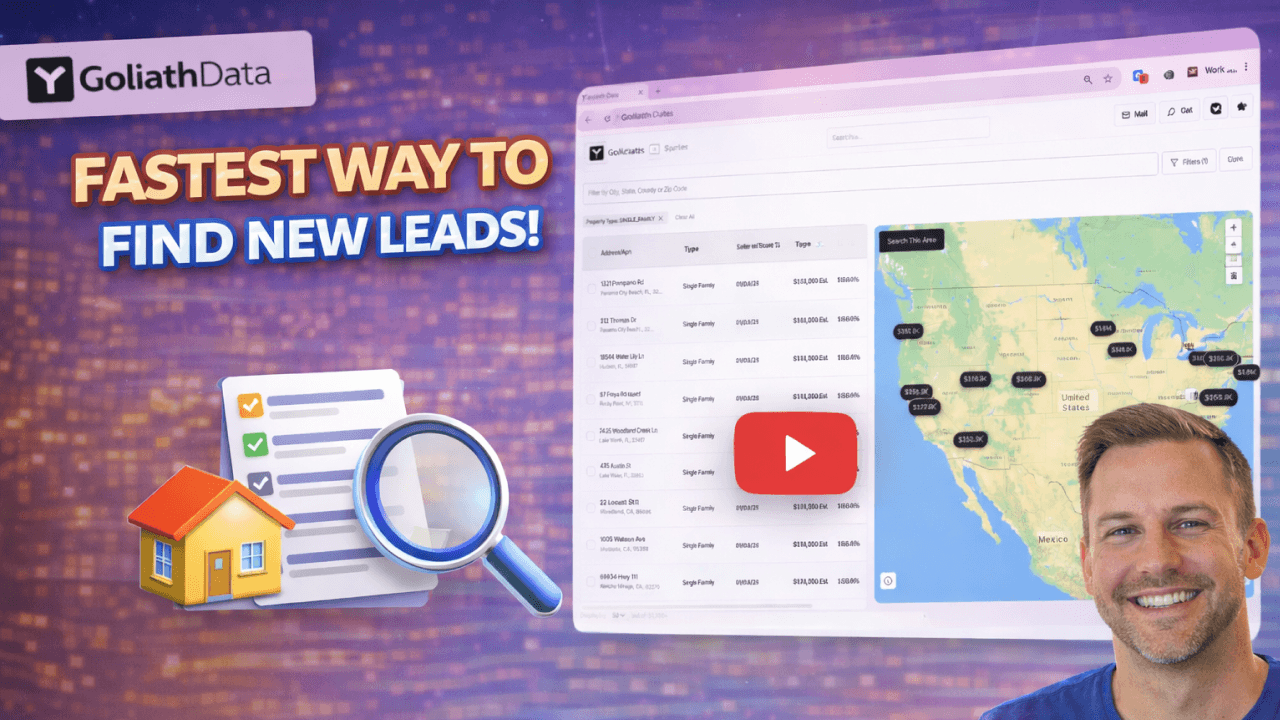
The Properties page in Goliath gives you a powerful way to find, analyze, and act on real estate opportunities. By using filters, lists, and quick actions, you can build targeted property segments, dive into detailed property data, and move directly into skip tracing or outreach. Whether you’re prospecting new clients or researching individual addresses, the Properties page helps you turn raw property data into organized, actionable opportunities.
What's covered in this video
1. Accessing the Properties Page 0:01
Learn how to navigate to the Properties page and use it to prospect new clients or research individual property addresses.
2. Understanding Filters 0:11
See how filters are organized on the left side of the page, including personal filters visible only to you and team filters shared across your organization.
3. Creating Property Lists 0:21
Discover how to create custom property lists by selecting multiple properties, using actions, and adding them to new or existing lists. Lists can also be created from uploaded data.
4. Managing Uploaded Files 0:47
Find where uploaded property files live, including lists like pre-foreclosures or tax delinquencies sourced from external data.
5. Managing Filters and Lists 0:57
Learn how to rename, move, duplicate, and edit filters, as well as organize, rename, or delete property lists to keep your workspace clean.
6. Applying Filters 1:13
Explore filtering options available in the top right, including property type, location, event-based filters, and bed and bath criteria.
7. Running a Test Filter 1:38
Watch an example of applying multiple filters together to create a targeted property segment, such as single-family homes in a specific county.
8. Viewing Property Details 2:05
Click into an individual property to review estimated values, rental insights, ownership details, and historical transaction data.
9. Skip Tracing Properties 3:01
See how to skip trace a property to retrieve owner phone numbers and email addresses directly from the Property Details page.
10. Downloading Catalyst Events 3:10
If you’re on the Scale plan, learn how to access and download original source documents tied to catalyst events like liens or judgments.
11. Bulk Actions on Properties 3:24
Understand how to take action on multiple properties at once, including skip tracing, exporting data, or adding properties to lists.
12. Using Quick Filters 3:48
Use quick-fill filters to instantly surface common property categories such as pre-foreclosures or tax delinquencies.
Step-by-step breakdown
Overview
The Properties page is built around three core areas:
Filters and lists on the left side
Property results in the main table
Actions and quick filters in the top right
Together, these tools help you narrow down properties, organize data, and move quickly from research to outreach.
Filters and Lists
On the left side of the page, you’ll find filters and lists used to segment properties.
Filters are divided into two types:
Personal filters, which are only visible to you
Team filters, which are shared across your organization
Lists represent groups of properties that have been saved or uploaded into the platform.
You can create a list by selecting multiple properties, choosing Actions, selecting Add to List, and creating a new list. Lists will appear in the left panel once created.
Lists can also be generated automatically when uploading data into the platform. Uploaded files such as pre-foreclosures, tax delinquencies, or other sourced lists will appear here for easy access.
Both filters and lists can be managed directly from the left panel. You can rename, duplicate, move, edit, or delete them to keep things organized.
Applying Property Filters
In the top right corner of the Properties page, you’ll find additional tools:
Filters
List View
Actions
Filters can be applied to any property results in the table. Available filters include:
Property type
County, city, or location
Event-based filters such as pre-foreclosure or tax delinquency
MLS status for applicable plans
Bedrooms and bathrooms
Days on market
These filters allow you to build highly customized property segments.
When applying filters, pay close attention to AND / OR logic. For example, selecting single-family homes and properties in Hamilton County, Tennessee will return only addresses that meet both criteria.
Viewing Property Details
Clicking on any property opens the Property Details page, where Goliath provides a comprehensive breakdown of available data.
This includes:
Estimated property value
Estimated investor price
Estimated rental value
Bed and bath count
Square footage
Owner information and mailing address
Scrolling further reveals additional insights when available, such as:
Rent and comp snapshots
Zoning and legal description
Comparable neighborhood properties
Transaction history
Mortgage details including lender and interest rate
Owner Information and Catalyst Events
On the right side of the Property Details page, you’ll find:
The current owner listed on deed
Related individuals when available
Catalyst events tied to the property
Catalyst events may include items like liens, tax delinquencies, or judgments. If the owner holds multiple properties, those will also be displayed here.
For users on the Scale plan, catalyst events can be opened to view and download the original source documents, such as court filings or county records.
Skip Tracing Properties
From the Property Details page, you can skip trace an individual property to retrieve phone numbers and email addresses for the owner.
You can also skip trace in bulk by selecting multiple properties from the table, choosing Actions, and selecting skip trace. From there, you can:
Skip trace and export property data
Skip trace and create contacts
Export property-only data
Using Quick Filters
Quick filters in the top right allow you to apply common filters with a single click. These are useful for fast segmentation, such as:
Pre-foreclosures
Tax delinquencies
Probates
Selecting a quick filter immediately updates the property list to match that criteria.
Best practices, tips and tricks
A few best practices
Start broad with filters, then narrow down to avoid over-constraining your results too early
Use team filters for shared strategies and personal filters for experimentation
Keep lists clean by archiving or renaming outdated segments
When to use filters vs lists
Use filters to discover and explore new property opportunities
Use lists to save, organize, and return to properties you plan to work
Convert high-intent filtered results into lists before taking action
Working with property data
Always review Property Details before skip tracing or outreach
Use estimated values and rent data as directional guidance, not final underwriting
Check catalyst events and ownership history to understand motivation signals
Skip tracing and outreach
Skip trace only after confirming the property meets your criteria
Use bulk skip tracing for efficiency once a list is finalized
Create contacts from skiptraced properties to keep outreach organized
Using quick filters effectively
Use quick filters for fast list building or daily prospecting
Combine quick filters with additional criteria for better targeting
Save refined results as lists to reuse later
Recommended daily workflow
Apply filters to surface new opportunities
Review Property Details on the most promising addresses
Save qualified properties to lists
Skip trace and take action once criteria is confirmed
