Inside Goliath: an overview of the contact details page
Everything you need to track conversations, properties, tasks, and follow-ups in one place.

Austin Beveridge
Tennessee
, Goliath Teammate
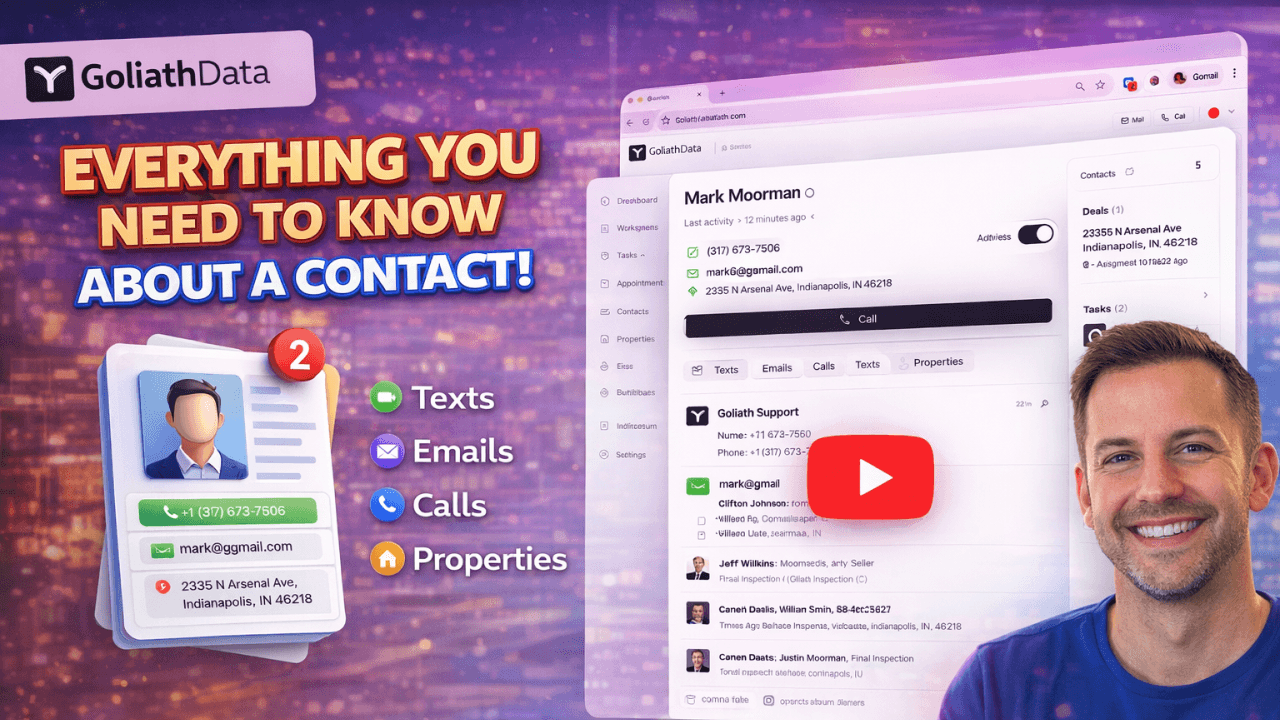
This guide breaks down the Contact Details page in Goliath and shows how to access, edit, and manage contact records effectively. You’ll learn how to update contact information, add notes, track activity, manage deals and tasks, schedule appointments, upload files, and collaborate with teammates. The goal is to keep every contact record organized, current, and ready for action. Check out the full video here: https://www.loom.com/share/db5eda5242a0435daab81db0a9cff911
What's covered in the video
1. Accessing the Contact Details Page
Navigate to the Contact section of the application
Select a contact to view their Contact Details page
2. Editing Contact Information
Locate the first and last name of the contact at the top left
To edit, click the pencil icon next to the contact's information
Update the email address, phone number, or address as needed
3. Archiving and Rounding Robin Contacts
If a contact is no longer usable, select the archive option
To distribute contacts among team members, use the round robin feature
4. Enriching Contacts
Identify contacts that need enrichment
Use the enrich option to add additional information
5. Managing Related People
View related individuals on the left side of the Contact Details page
Access their phone numbers for communication
6. Custom Fields and Tags
Utilize custom fields to track specific information (e.g., price, stage, motivation)
Add or create tags to categorize contacts based on your needs
7. Viewing Additional Properties
Check for any additional properties owned by the contact
8. Adding Notes and Communication
Enter notes for internal use or for team visibility
Use the text or email options to communicate with the contact
9. Managing Activity Feed
Sort through the activity feed to view notes, calls, texts, and emails
Choose to show or hide activities as needed
10. Tracking Deals and Tasks
Use the deal card to track specific properties associated with the contact
Create and assign tasks for follow-ups, calls, or emails
11. Scheduling Appointments
Add appointments for callbacks or personal meetings
Assign appointments to team members
12. Uploading Files and Adding Contributors
Upload relevant files (e.g., contracts, photos) for the contact
Add contributors from your team to collaborate
13. Enrolling in Automations
If applicable, enroll the contact in any automations you have set up.
Best practices, tips and tricks
A few best practices
Update contact information immediately after conversations
Use notes consistently to capture context and next steps
Keep records clean by archiving contacts that are no longer relevant
When to use the Contact Details page
Use the Contact Details page as the source of truth for each relationship
Use it before calls or meetings to review history and context
Use it after interactions to log updates, notes, and follow-ups
Contact organization and ownership
Assign contacts to the appropriate team member for accountability
Use tags and custom fields to reflect motivation, stage, or priority
Add contributors when multiple teammates are involved
Recommended daily workflow
Open the contact record before every call or appointment
Add notes and update fields immediately after conversations
Create tasks or appointments directly from the contact page
Review activity feeds to stay aligned with team interactions
